
Artifact # 1 - Tagxedo Word Cloud (tagxedo.com)

|

|
For my first artifact I used tagxedo.com to make a word collage for my grade 7 Social Studies class. Tagxedo is a free (web-based application that is accessible on a computer. It works for both PC and Mac. There is no mobile app at this time. According to the website, Tagxedo "turns words -- famous speeches, news articles, slogans and themes, even your love letters -- into a visually stunning word cloud, words individually sized appropriately to highlight the frequencies of occurrence within the body of text." Before I used Tagxedo, I was aware that word collages could be made, but I had never seen ones that were made in the shape of an image. I now know how to use the program and how to use customized features.
I have always loved word collages, but I have never had a reason to try making one for myself. When I searched word collages online, Tagxedo caught by eye. I liked Taxedo because I could create a picture with my words, as opposed to just a collage with words. I played around with the pre-made templates but where I was making a word collage for my Canadian Social Studies class, I really wanted to create a collage with a Canadian theme. Using this program expanded my skill set because I had never used it before and I not only used the pre-set features, but customized my collage with a custom shape and a custom colour scheme.
I created this word collage for my Grade 7 Social Studies class and will store it on my class Moodle. It is supposed to represent the units, skills, and resources that students will encounter throughout their year. A Tagxedo word cloud could be used as an assessment activity to demonstrate understanding of topics. I plan on using it as an assessment tool at the end of our Economic Empowerment unit.
Also good to know:
- According to Tagxedo's FAQ website (http://www.tagxedo.com/faq.html), the application is currently free but will at some point only remain free for basic use and custom features (such as customizing colours and shapes) will only be included in a premium subscription. There is currently no Tagxedo app.
- Also, Tagxedo is not exactly Mac friendly. The FAQ explains why, but basically, the application uses Silverlight 3 and requires a download and a reboot (even thought it may not prompt you to reboot). I use a Mac and could not get Tagxedo to work...but I didn't bother to reboot. I used a PC instead and it worked well.
- You can easily google for Tagxedo support. Before I discovered the FAQ page, I used http://blog.tagxedo.com/a-mini-tutorial-on-custom-shape to provide me with the steps for using a custom shape.
- Also, if you want to create a custom colour scheme (called a theme on the website), you can do this but you have to know HTML colour codes. This website helped me select the colours I wanted and provided me with the coding information needed to make it happen: http://html-color-codes.info/. Tagxedo does not provide any support in this area...and I don't know about you, but I don't know my HTML colour codes by heart!
- Overall, I really enjoyed creating Tagxedo word clouds. I created several and chose to share two of my favourites.
Artifact # 2 - Kahoot! (https://getkahoot.com/)

Image retrieved from: martinjohannessen.blogspot.com
Image retrieved from: getkahoot.com
Image retrieved from: getkahoot.com
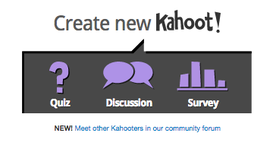
Image retrieved from: getkahoot.com
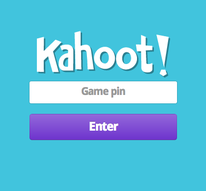
Image retrieved from: kahoot.it
|
For my second artifact I used an online application called Kahoot!. Kahoot! is an online tool where you can create and play quizzes and have discussions or conduct surveys. Kahooters (users) can use any device with a web browser (a laptop, iPad, iPhone, iPod, Android, Chromebook, Windows Phone or PC, etc.) to interact with a Kahoot! (quiz, discussion, survey). Kahoot! uses a game-based approach to encourage engagement with its users. Kahoot! is free to join and quizzes can only be accessed by other Kahoot! users. Kahoot!s accounts are created and managed through getkahoot.com and users access Kahoot!s through the site, kahoot.it using a randomly generated pin provided by getkahoot.com. Kahoot! games can be set to private or public, so if you want to keep your Kahoot!s for your use only, you have that option.
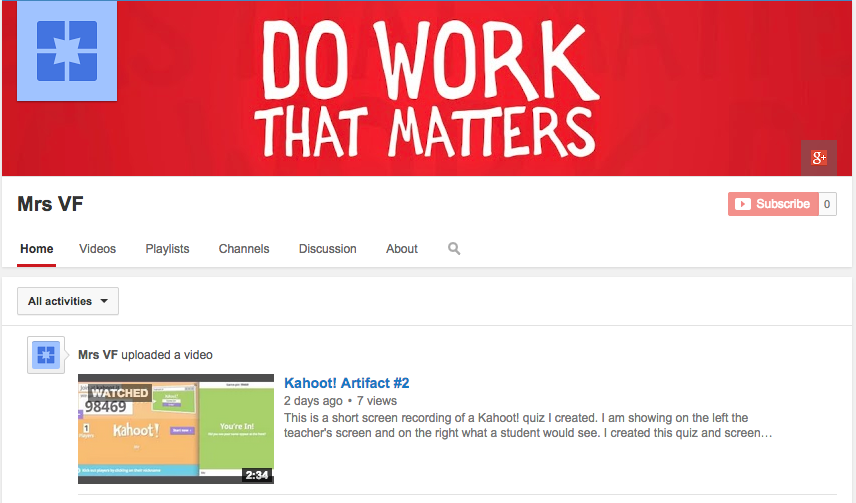
I created this artifact before I knew that you could only share Kahoot!s with other Kahoot!ers. Since I really think that Kahoot! is a great tool for engaging student learning through technology, I wanted to figure out a way to share this. To do this, I took a screen recording of me both administering my Kahoot! and playing my Kahoot! as a user. I opened 2 browsers on my screen and logged into my Kahoot! account in one browser and then in the other browser, went to kahoot.it and entered the pin to play the Kahoot!. To create the screen recording I googled and found out that I could use QuickTime. I checked my computer and it had QuickTime already installed. However, I couldn't figure out how to record with sound. A few more googles later and I discovered that QuickTime can use the computer's mic (this will not produce a recording with great quality sound, but I went ahead with it). My next step was to figure out how to create a YouTube Channel so that I could share my Kahoot! video. The Youtube channel is now my third artifact. I hope the video is a useful way to check out Kahoot! If you are interested in using my Kahoot! or trying it out, simply create a free account and whereas I set this Kahoot! to be accessible by the public, you should be able to locate it by the keyword "empowerment". Using Kahoot! itself was very easy to figure out how to use. The program is designed to be "drag and drop" and all information needed is at your fingertips. The program is visually appealing and fun to use to create quizzes (I haven't tried a discussion or survey, yet). I am not primarily a classroom teacher (I am co-teaching one section of grade 7 Social Studies) and haven't really taught in a traditional classroom in about 5 years. I am primarily a resource teacher and spend most of my time supporting students in learning how to learn. I do a lot of work using technology, but it is mostly teaching students how to access learning using an iPad's assistive features and specific apps. I don't often have a reason to lean new, cool, exciting ways to assess student learning. However, now that I have a Kahoot! account, I can see me using Kahoot in a few ways: when I do small group work I can use it as a engaging assessment piece; I can encourage students to use Kahoot! when showing their learning and create their own quizzes; I can introduce it to teachers in my Universal Design PLC; I can use it when I give presentations; and I can continue using it in my shared classroom as a way to engage students as they learn. Using Kahoot! itself was pretty easy but it is definitely a tool that I am pleased to add to my skill set as students seem to really enjoy it! My staff considers me to be really techie, but I don't often feel that I have a lot to share in the realm of student engagement - I am happy to add Kahoot! to my toolbox. However, I think trying to share my Kahoot! is what really expanded and challenged my skill set! A good many hours went into this assignment :) |
Artifact #3 - YouTube Account & Edited Video
A screen shot of my YouTube channel.

Best Teacher Resources Blog
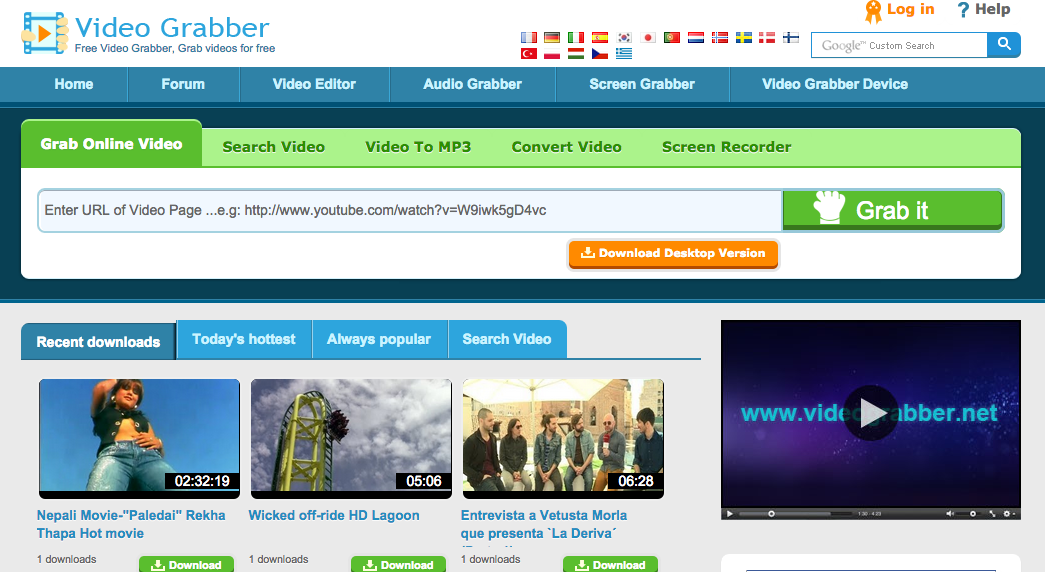
Video Grabber
|
Creating this last artifact was perhaps my most challenging as I really struggled with what to create. I did some googling and looked up "101 Web 2.0 Tools for Teachers You Should Know About" from the provided class notes. The Best Teacher Resources Blog came up from my google search. As I scrolled through the list, something called TubeChop caught my eye. The description read: If you want to show a YouTube video in class that isn’t entirely appropriate or relevant, use TubeChop to cut out all of the excess and only keep what you want to show." This made me think of a video I wanted to show my Grade 7 Social Studies class but I didn't want to show all the content.
When I went to look up my video, I realized that it was housed on Vimeo...not YouTube! So I had to find a Vimeo downloader. I googled and found Video Grabber. I downloaded Apowersoft Video Downloader for Mac from the site and then, downloaded the video I wanted. I then uploaded it to my YouTube Channel. I was then able to use TubeChop on the video...only to find out that it didn't do what I needed it to - I wanted to "chop" the video in multiple sports, but TubeChop only allows one chop. I then went back to google to see if I could find info on editing YouTube videos. I found How to Trim Your YouTube Videos, a video on Youtube about how to use YouTube itself to edit videos. This quick tutorial showed me that I could use YouTube to trim videos - how easy! I followed the video's advice and trimmed away. Essentially, you need to be logged into your account, then select "My Channel", then select "Video Manager", then find the video you want to edit and select "Edit". In edit mode, select "Enhancements". I edited my selected video in 3 places and saved each as a separate, new video. After this, I then selected "Combine clips and make a new video". This was very easy to do and I took my three clips and created a video that I can use in my Social Studies class. I then further edited my video to add pop-up notes throughout the video as prompts for students to consider as they watch the video. I am choosing not to share this video on an open website site as I am not exactly sure if what I did was legal! The video is private on my account as I only plan on using it as a teaching aid. Full credit to its creators is provided as well as where to find the original video. I am new to using my YouTube account and I can see that I will use it often. I used to download YouTube videos to my computer using MacX YouTube Downloader (a free software), but I can now just add them to my Youtube account for easy viewing. I enjoy having students make videos but sharing them has always been a real challenge. Now, I can just upload student videos to my account! So what started as creating a YouTube account and what I thought would be a simple exercise in chopping a video has turned into me learning how to grab videos from other websites, also editing and combing clips, adding annotations, and how to share private videos. |
